

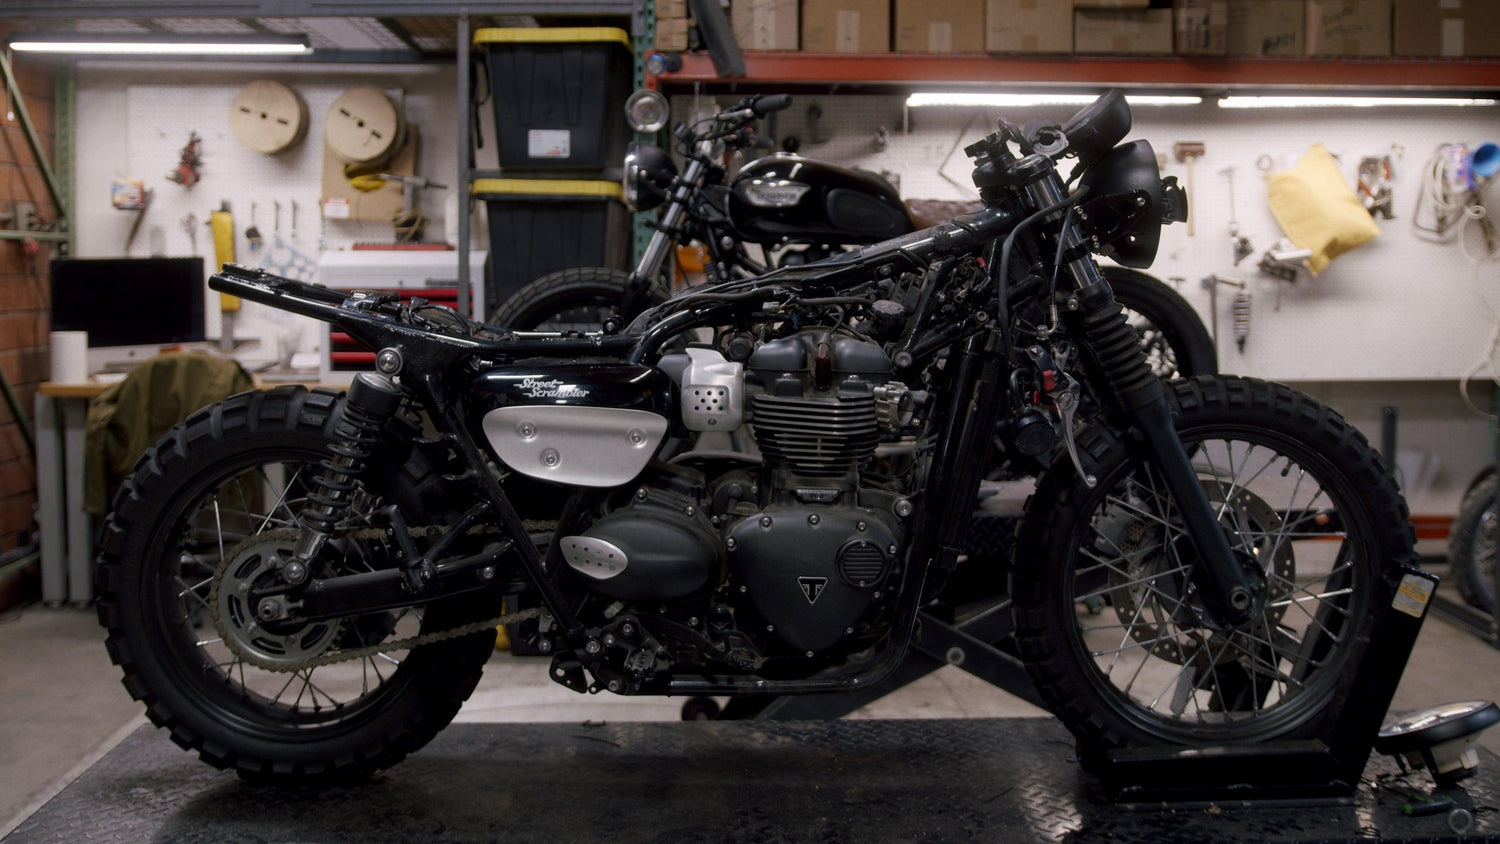
We purchased our 2019 Street Scrambler secondhand about a year ago for the purpose of development. Everything we do here, we design and test, so we wanted to build an aggressive bike that could be taken off-road. We started with the Street Scrambler parts we had and started the development process of our off-road Street Scrambler.
Table of Contents
- Street Scrambler Upgrades for Off-Roading
- Improve Suspension
- The Teardown
- Remove the Turn Signals
- Remove the Fuel Tank
- A Little Bit More About Our Process
1. Street Scrambler Upgrades for Riding Off Road
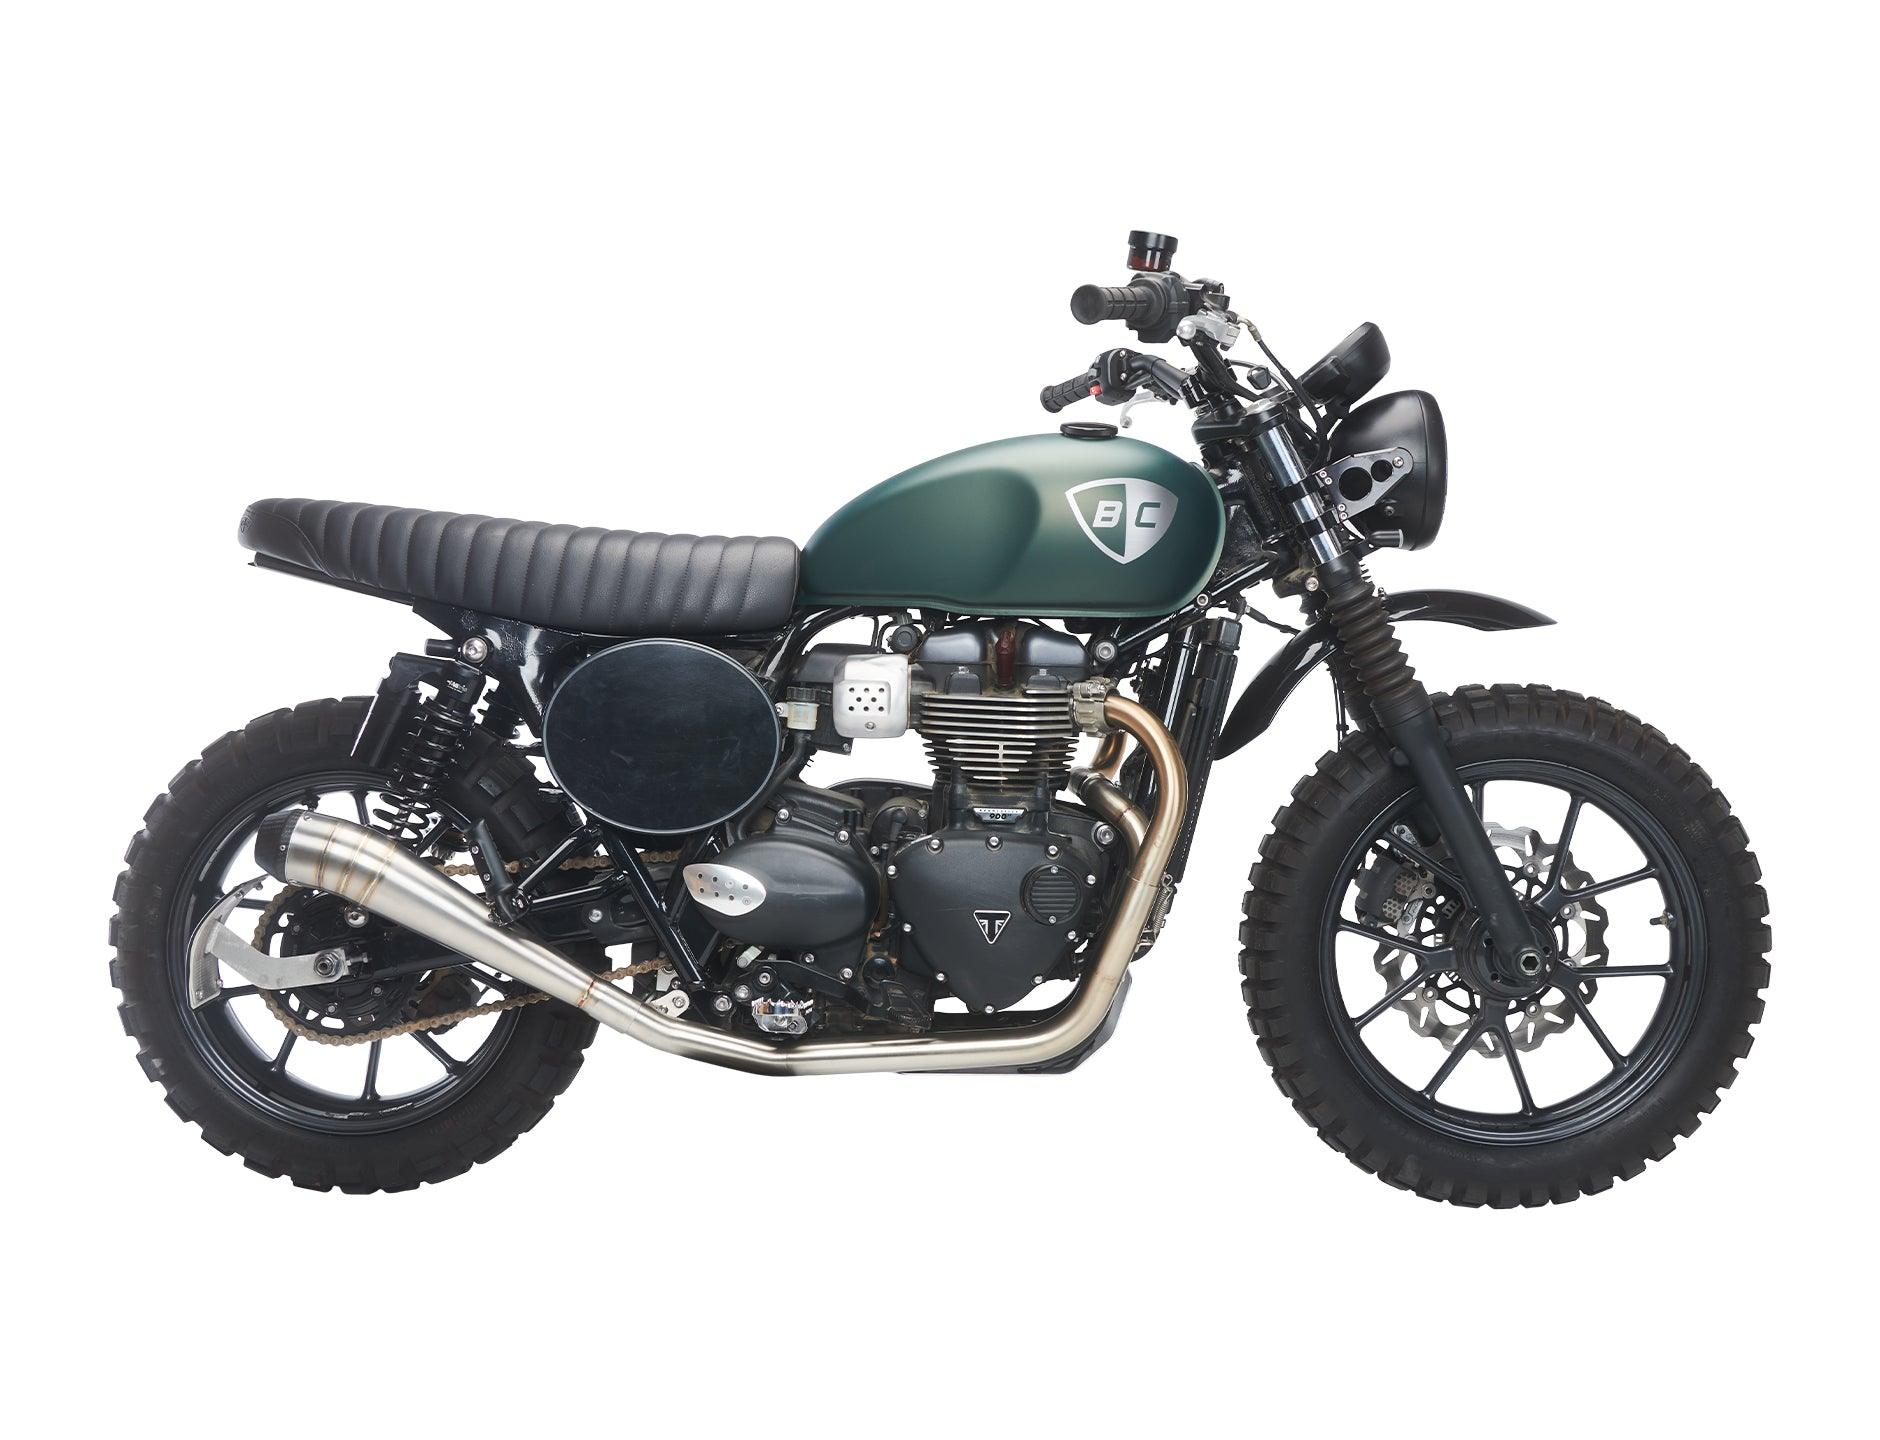
One of the first Triumph Street Scrambler mods we developed was the Pan Tail Light with Retro Turn Signals. We stuck with the standard shock mount turn signal, but we opted for the LED version of our Retro Turn Signals. To do this, we had to put in load equalizers and plug and play connectors on the bike. From there, we upgraded the seat. We discovered that the seat with the rack is a simple change-over to the slammer seat if you move the mounting locking mechanism.
For an aggressive stance for our off-road Street Scrambler build, we went with our Pro Taper Dirt Track Bar. We shortened it about three quarters of an inch on each side to maintain the stock brake line. Finally, we upgraded the headlight ears to the retro headlight ears, put on aggressive TKC80 Knobby Tires for both street and off-road riding, and upgraded to a High Mount Fender Bracket to lift up the fender and give it an aggressive dirt bike look.
2. Improve Suspension
After testing our off-road Triumph Street Scrambler out in the desert of Ocotillo Wells, California, there were some mods we wanted to make based off rider feedback to optimize the overall ride. The suspension needed a lot of work, as the suspension would fully compress, using up all of its travel (also known as suspension bottom-out) while riding in some mildly technical sections of the dirt.
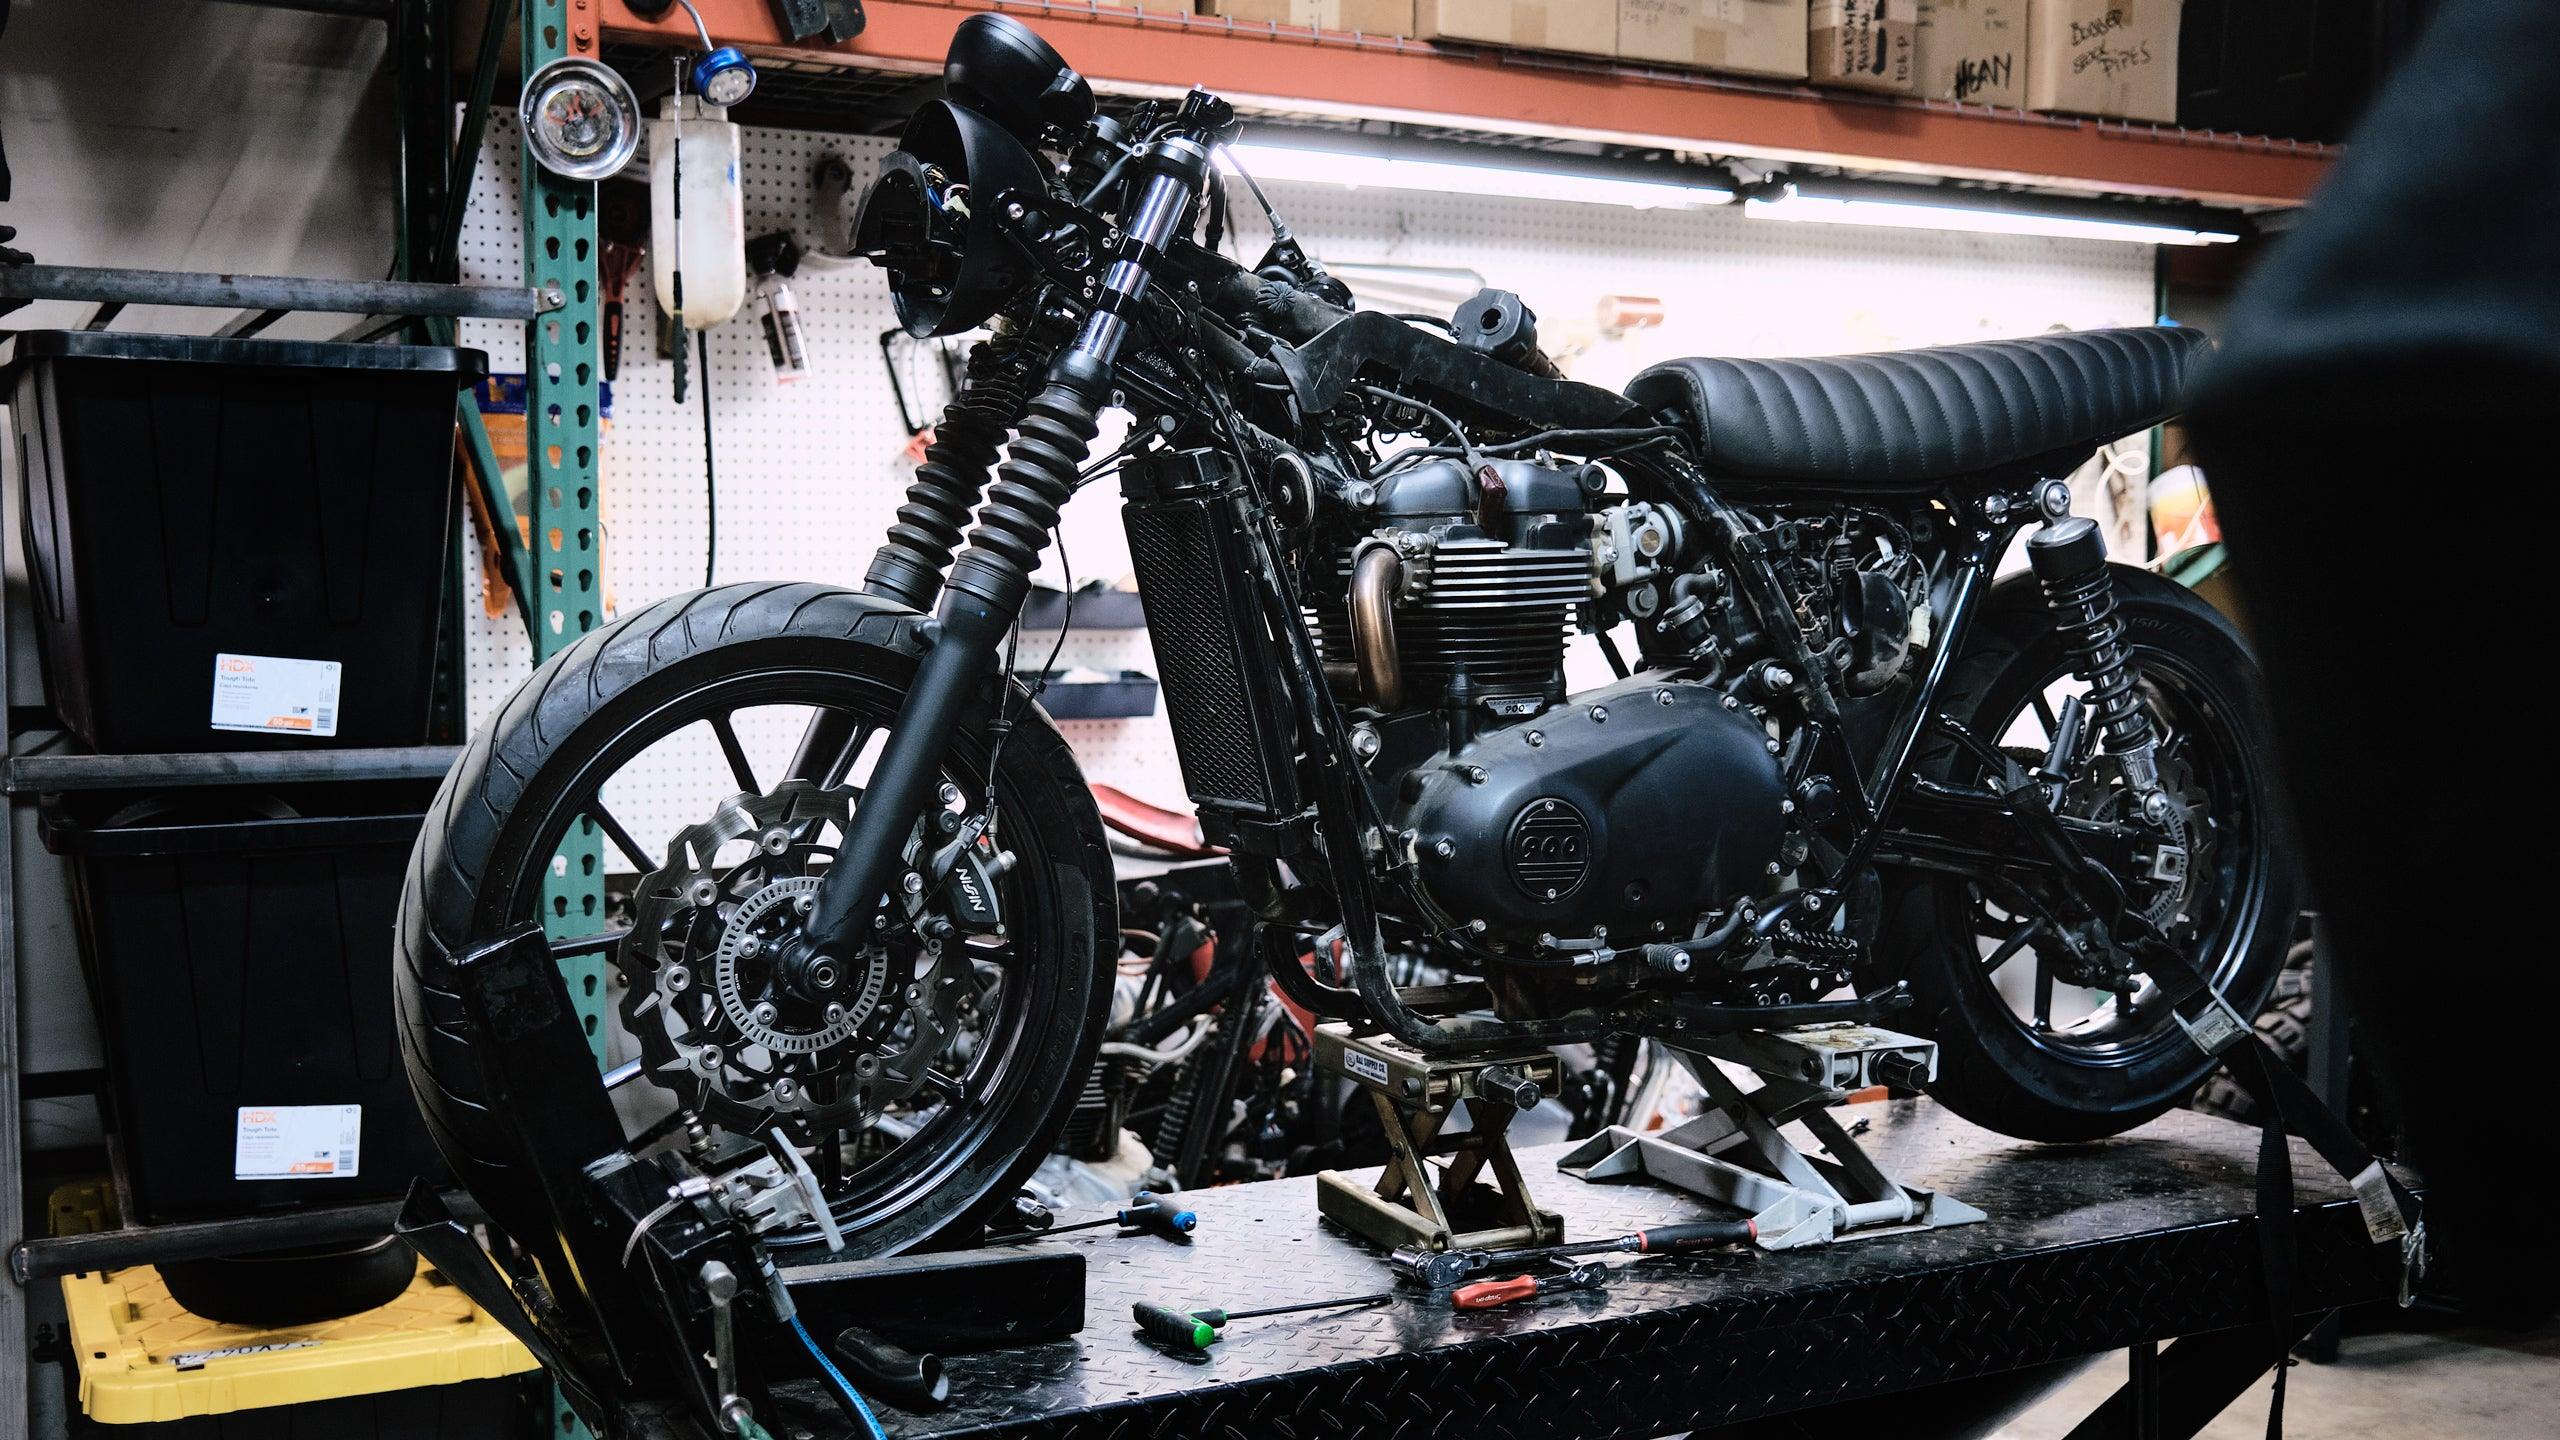
So we’re going to completely tear the bike down, start from scratch, and come up with a new design. We want more classic lines and something a little more retro, but we still want the bike to perform. We’re going to change the rear and front suspension and try to get the bike to travel so we can continue to go out in the desert and have fun on our off-road Street Scrambler without feeling limited by the suspension.
3. Remove the Seat
The teardown starts with the rear of the bike. The first step of our off-road Street Scrambler build is to take off the seat. There's a seat latch that’s repositioned with the rear, and the factory Street Scrambler seat uses this location to mount the slammer seat. This is as simple as unscrewing and relocating the latch to the rear of the bike. The plug and play harness uses the OEM connectors without any cutting or wiring required. It’s as simple as plugging it in and bolting it on. Then remove the fender.
4. Remove the Turn Signals
To remove the turn signals, we have to remove the headlight. On the liquid cooled model, there’s a wire organizer that is secured with self-tapping screws. We may have over-tightened a self-tapping screw. As we remove this, it’s just a self tapping screw into plastic — probably not the best decision. Removing the turn signals once again, disconnect the plug and play OEM connectors, and you are ready to remove the turn signals.
One of things that we like to do on our bike builds is take off most of the factory parts and try to upgrade them. The Street Scrambler skid plate is made of plastic, but we’ll look for something a bit more substantial for off-road use, so we can go out and actually punish it. If we hit a rock, we’d like to be able to come home!
5. Remove the Fuel Tank
Anytime you’re about to remove a tank, we suggest you prop the back of the tank up for easy access to remove the vent line, the two electro-connectors, and the fuel injection connection. We machined up this piece that supports the tank when we prop it up.
In the development of the liquid-cooled models, we found out that the O2 sensor was part of a casting that was the header bung. One of the Triumph Street Scrambler mods we machined was a stainless steel solution that allowed us to securely mount headers and create a seamless flow from the bung to the pipe. In removing the header, there’s a smooth transition and the O2 sensors are in the factory location. This allows us a proper area to weld and secure the pipe to the header bung.
In designing the off-road Street Scrambler competition header, we reuse the left side header and had to completely redevelop the right side. Triumph has a cast piece to hold the O2 sensors. To develop headers, we had to machine up a replica so the O2 sensors would be in the same location to give us a secure mounting point for the pipe and allow a seamless design between pipe and header bung.
6. A Little Bit More About Our Process
Typically when we get a bike, we bolt on parts and accentuate what the bike already is. Now that we’ve taken the off-road Street Scrambler in the desert and tested it, we know what we want to change about it. We’ve stripped it down to a raw form and we’re going to rebuild it. Stay tuned on our blog and YouTube channel for the next episode.
Leave a comment
All comments are moderated before being published.
This site is protected by hCaptcha and the hCaptcha Privacy Policy and Terms of Service apply.